


The Bookmark Printables are super easy to use, but here are a few tips for printing and finishing best practices.

I print on an Epson Stylus Pro 3880. These instructions are probably about the same for most other inkjet printers.
Paper Selection
I like printing on the Epson Archival Matte Paper or the Heavy Weight Matte Paper (I think this may be called Presentation Matt Paper now.) Both of those are nice weights. I've found that using thin paper buckles during the laminating. If you are using a laser printer, just choose a quality, heavier weight paper.
Printing
For best color results when printing, it's best to use the ICC printer profile for your paper. Describing how to do this is beyond the scope of this post. Do a search for the ICC profile for the paper you will be using for your printer. You will have to do a little searching to find out how to download the ICC profile for your printer and paper and where to load it.
Once you get those loaded, in the print dialogue box, first choose your printer and page set up.
Then, make sure the Color Management says let Photoshop (or Elements, etc.) manage colors and choose the ICC profile for your paper. Here you can see I have chosen my Epson 3880 and the Epson Archival Matt paper. I usually leave the rest of the settings as is. They are more advanced options.
If this seems too overwhelming, just make sure you are choosing the right paper in the print settings and that you are choosing best quality. It will probably be fine!

Post-Printing Prep
Let pages dry 24 hours:
It's best to wait a day after printing to finish your bookmarks. Set them aside somewhere flat and safe with a piece of plain printer paper over each sheet to allow them to dry and "gas out".
Optional - Protective Spray
If you aren't going to be laminating your bookmarks, ideally spray your paper with a UV Archival protection varnish. This is optional, but will protect your bookmarks a little. This isn't necessary if you are going to laminate.
Optional Before You Trim
If you want a decorative paper for the back of the bookmark, apply before you trim. Be careful to not use a backing that is too thick if you plan on laminating. I wouldn't use chipboard for example. I've found if what I'm laminating is too thick, the lamination has a harder time adhering to the paper edges.
Trim
I use a paper trimmer to carefully trim the bookmarks, but an xacto knife and metal ruler are also fine.

Enhance
This is really, really optional and only for the artsy/crafty brave! I sometimes take pearl or metallic paint and dab a few areas of interest. Flower petals, a bird, etc. Be careful not to use paint that is too wet or to paint large areas. The printer ink may run and your paper will buckle. Let this dry. I usually wait 24 hours.
Laminate
I do recommend laminating. It gives a nice, long-lasting protective finish that holds up to dirt, moisture, and accidental bending. Laminators are surprisingly affordable these days. I picked mine up at a stationary store for around $30 and I could have saved even more if I had ordered online. You'll also need the laminating sheets of course. I don't remember what thickness I purchased. Normal office weight.
Important Laminating Tips
- When you set up the bookmarks in the laminating sleeve, be sure they are dust and hair free.
- Also make sure to leave a lot of space around each bookmark. Even though I give you 5 bookmarks, you can only laminate 4 at a time.
- I always have plenty of bookmarks printed and trimmed so I can laminate several sheets at a time.
- Read your laminating instructions. Mine came with a cleaning sheet that I need to use at the end of each laminating session.

Trim Again
After laminating, you need to trim down the bookmarks leaving around 4mm all around the printout. I just eyeball it.


Fancy Finishing
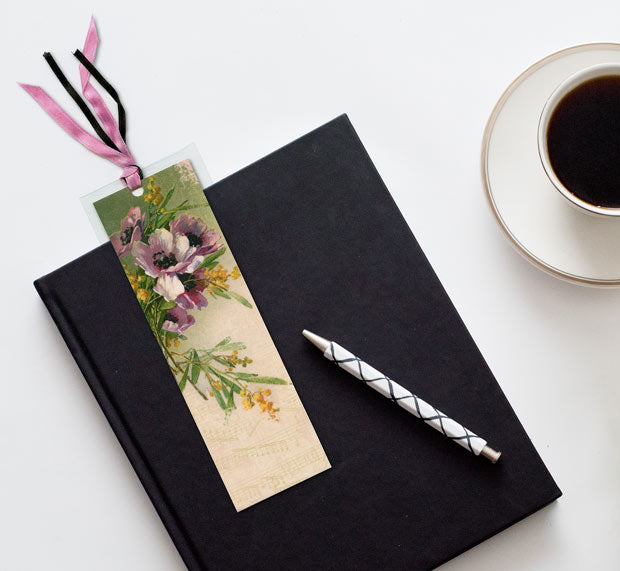
An optional finishing touch is to punch a hold at the top of the bookmark and then decorate with ribbon, cord, tassels. etc.


Share and Enjoy
It's so fun to share these as little gifts as stocking stuffers or in Happy Mail. It's just as enjoyable to tuck these in your journal, your planner, or a novel.


Leave a comment (all fields required)